How will water leave?
Choose and test the drain or siphon route before substrate hides the floor. Make sure it remains reachable after the hardscape and plants fill in.
 ™
™
Field notes · 2020 build
One vivarium designed and built from scratch: the glasswork, sliding doors, bottom drain, Sherman vent, background, planting, and grow-in period.
Follow the buildA working record
Two reasons. First, I wanted to know if I could design a vivarium from a blank sheet of paper instead of modifying someone else's. The thing that always bothered me about the Exo Terra was the bottom glass: there is no drain, so there is no clean way to remove the water that collects in the base. Second, the juveniles I started with in 2019 had grown up and started laying clutches of eggs. I knew that sooner or later I would want to see if I could follow through with the whole cycle, eggs to tadpoles to morphs to juveniles, and that meant building the room for it.
Before copying the build
Choose and test the drain or siphon route before substrate hides the floor. Make sure it remains reachable after the hardscape and plants fill in.
Plan the front and upper ventilation with the door system, misting pattern, room conditions, and maintenance access in mind.
Dry-fit wood, backgrounds, nozzles, sensors, lights, and drain access. A beautiful corner is a poor trade if it blocks a routine task.
Follow product directions, allow materials to cure fully, water-test the enclosure, and run the finished system long enough to find problems before occupancy.
Planning & dry fit
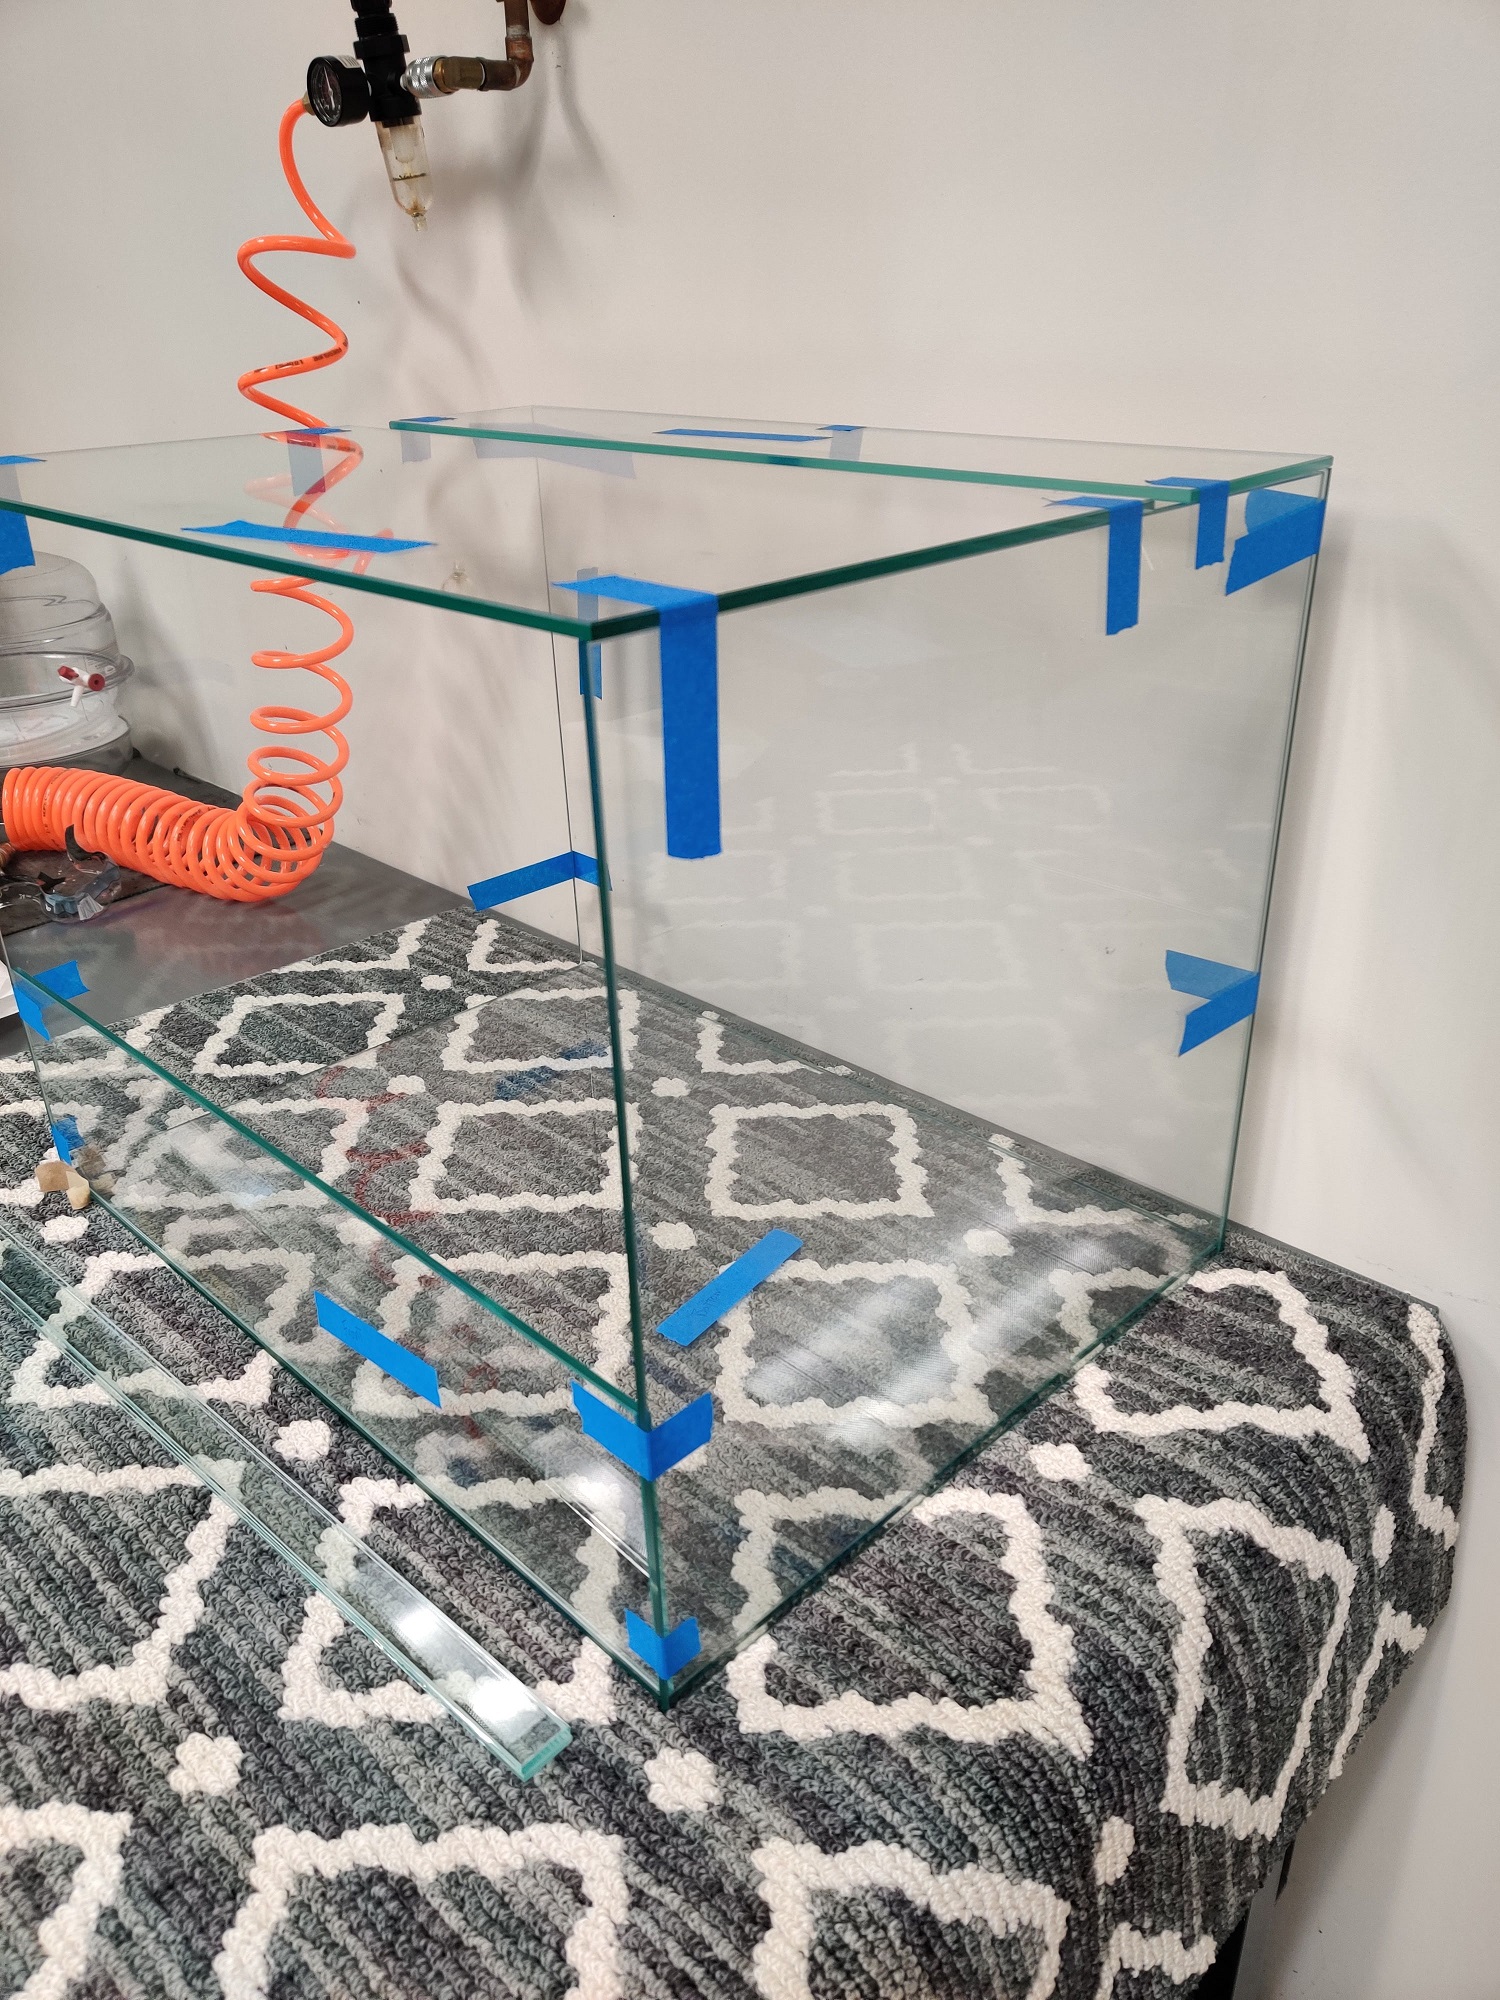
I took my time with this build and spent a couple of months just working out the dimensions. I am an electronics engineer by trade, but I have a solid foundation in anything mechanical, and some of this I simply knew from working in new construction: the load path matters. The load-bearing glass walls had to sit under the top piece of glass, carrying its weight straight down, not just butting up against it.
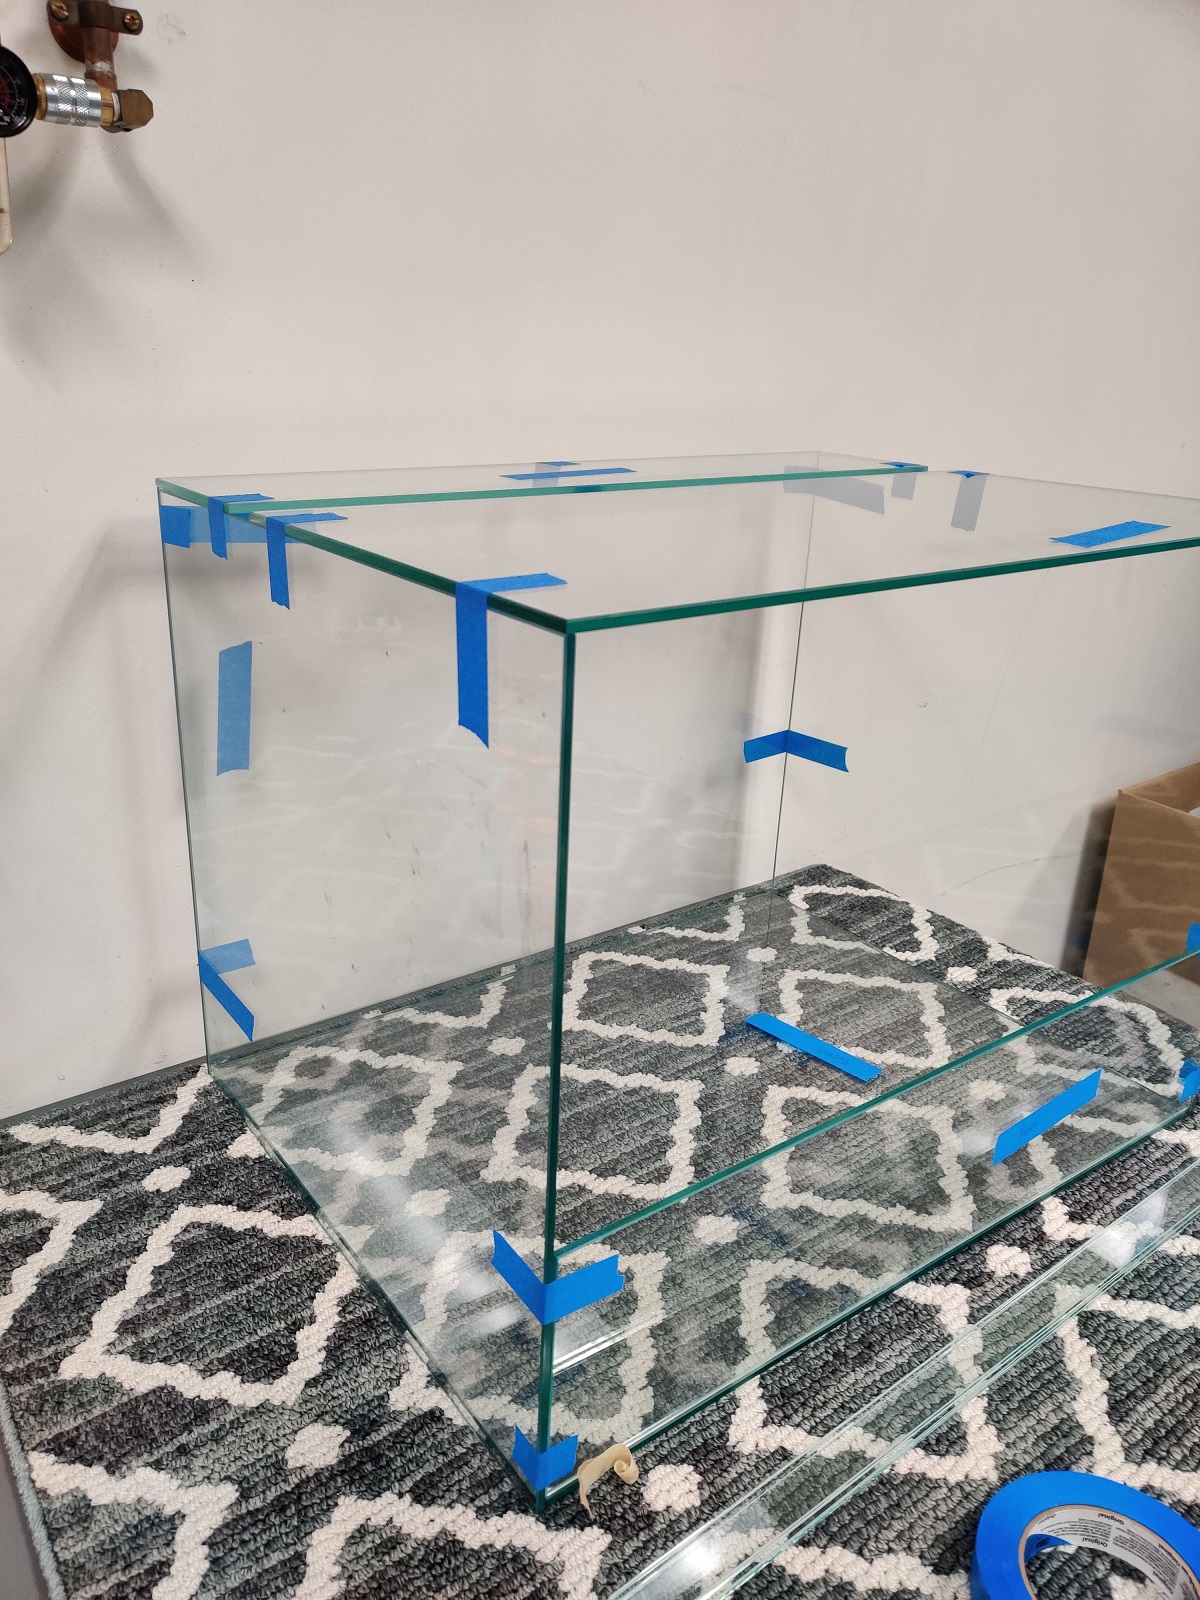
The tank got drawn out many times. Then I cut cardboard panels and test fitted everything full size to see whether the sizing matched what I had envisioned. After some tweaks here and there, I found a local glass shop and ordered the pieces. The glass came out a little on the thick side, but I over-engineer on purpose. Before anything was permanent I also checked the doors, ventilation, background depth, wood placement, and access for misting and drainage. A dry fit catches blocked sightlines and maintenance problems while changes are still easy.
Glass, doors & drain
The enclosure went together with aquarium silicone, not the regular hardware store kind, which can carry additives you do not want sealed inside with animals. After the glued panels cured, I went back and sealed every corner and seam.
I wanted front doors that swing open like the Exo Terra's, but gluing or screwing hinges to both sides of the glass never sat right with me. I could have done it, but I did not want the hinges to be the weakest link in the build. So I went with dual sliding glass doors instead: two lengths of E-channel, top and bottom, and the door panes just glide. It worked great. To keep them latched, I stuck on four adhesive-backed sliding mirror handles. Each one is just a small protrusion, and a rubber band looped between them secures the doors.
Then the feature that justified the whole project: the drain. I drilled through the bottom glass with a diamond hole saw, using a putty well around the spot to hold a puddle of water as coolant. It took a few minutes and left a nice clean hole. Gaskets and a bulkhead fitting finished it off, so the water that collects in the base can be drained without tearing anything apart.
Ventilation
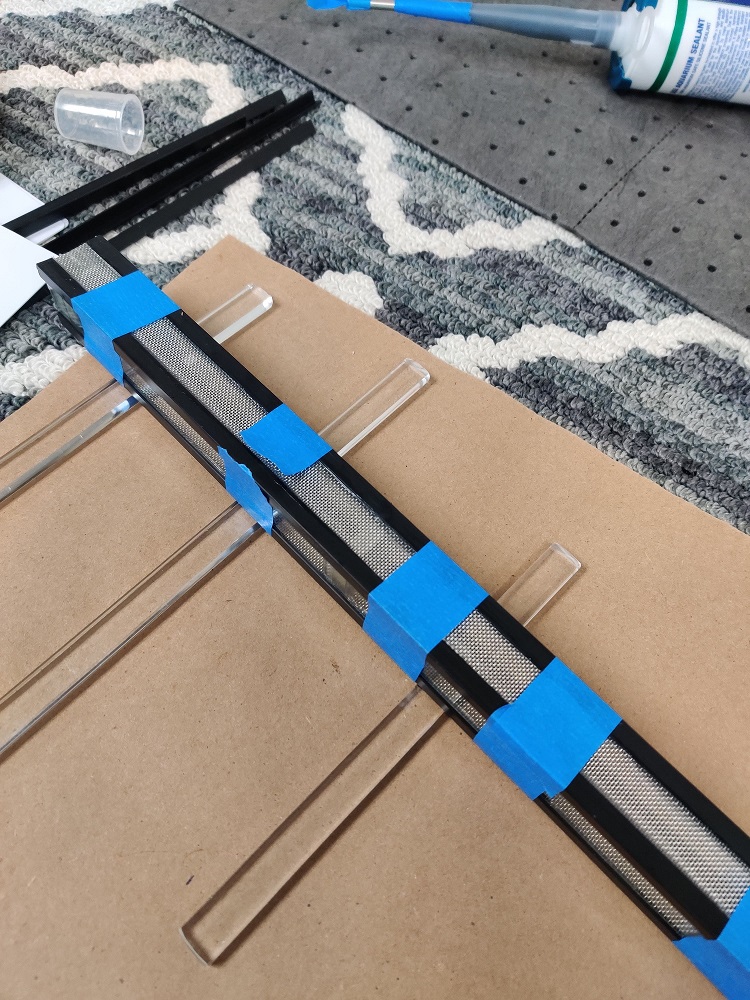
I wanted venting to be easy and I wanted to minimize condensation on the inside of the glass. While researching, I found the Sherman vent, a design Chris Sherman shared with the dart frog community back in 2013. It is a low-profile fresh-air intake that hides under the front doors, built from strips of glass and screen. The clever part is that the screen sits vertically, so misting water cannot drip down through it the way it does with the older European-style vents, and it does not waste any space at the front of the tank.
For the exhaust, the top of the tank is two pieces of glass with an open 1-inch channel between them. The split lands about a sixth of the way in from the back, so the vent runs across the back half of the tank. Paired with the Sherman vent down low, that channel sets up a great natural convection loop: fresh air in under the doors, humid air out the top rear, and the moving air keeps the front glass clear.
When I want more than convection, I do what I did on the Exo Terra: a piece of U-channel runs across the front of the vent with a small 60 mm 12-volt blower at each end. They do not move a ton of air, and they do not need to, because an ESP32 switches them exactly when the humidity calls for it.
Drainage & false bottom
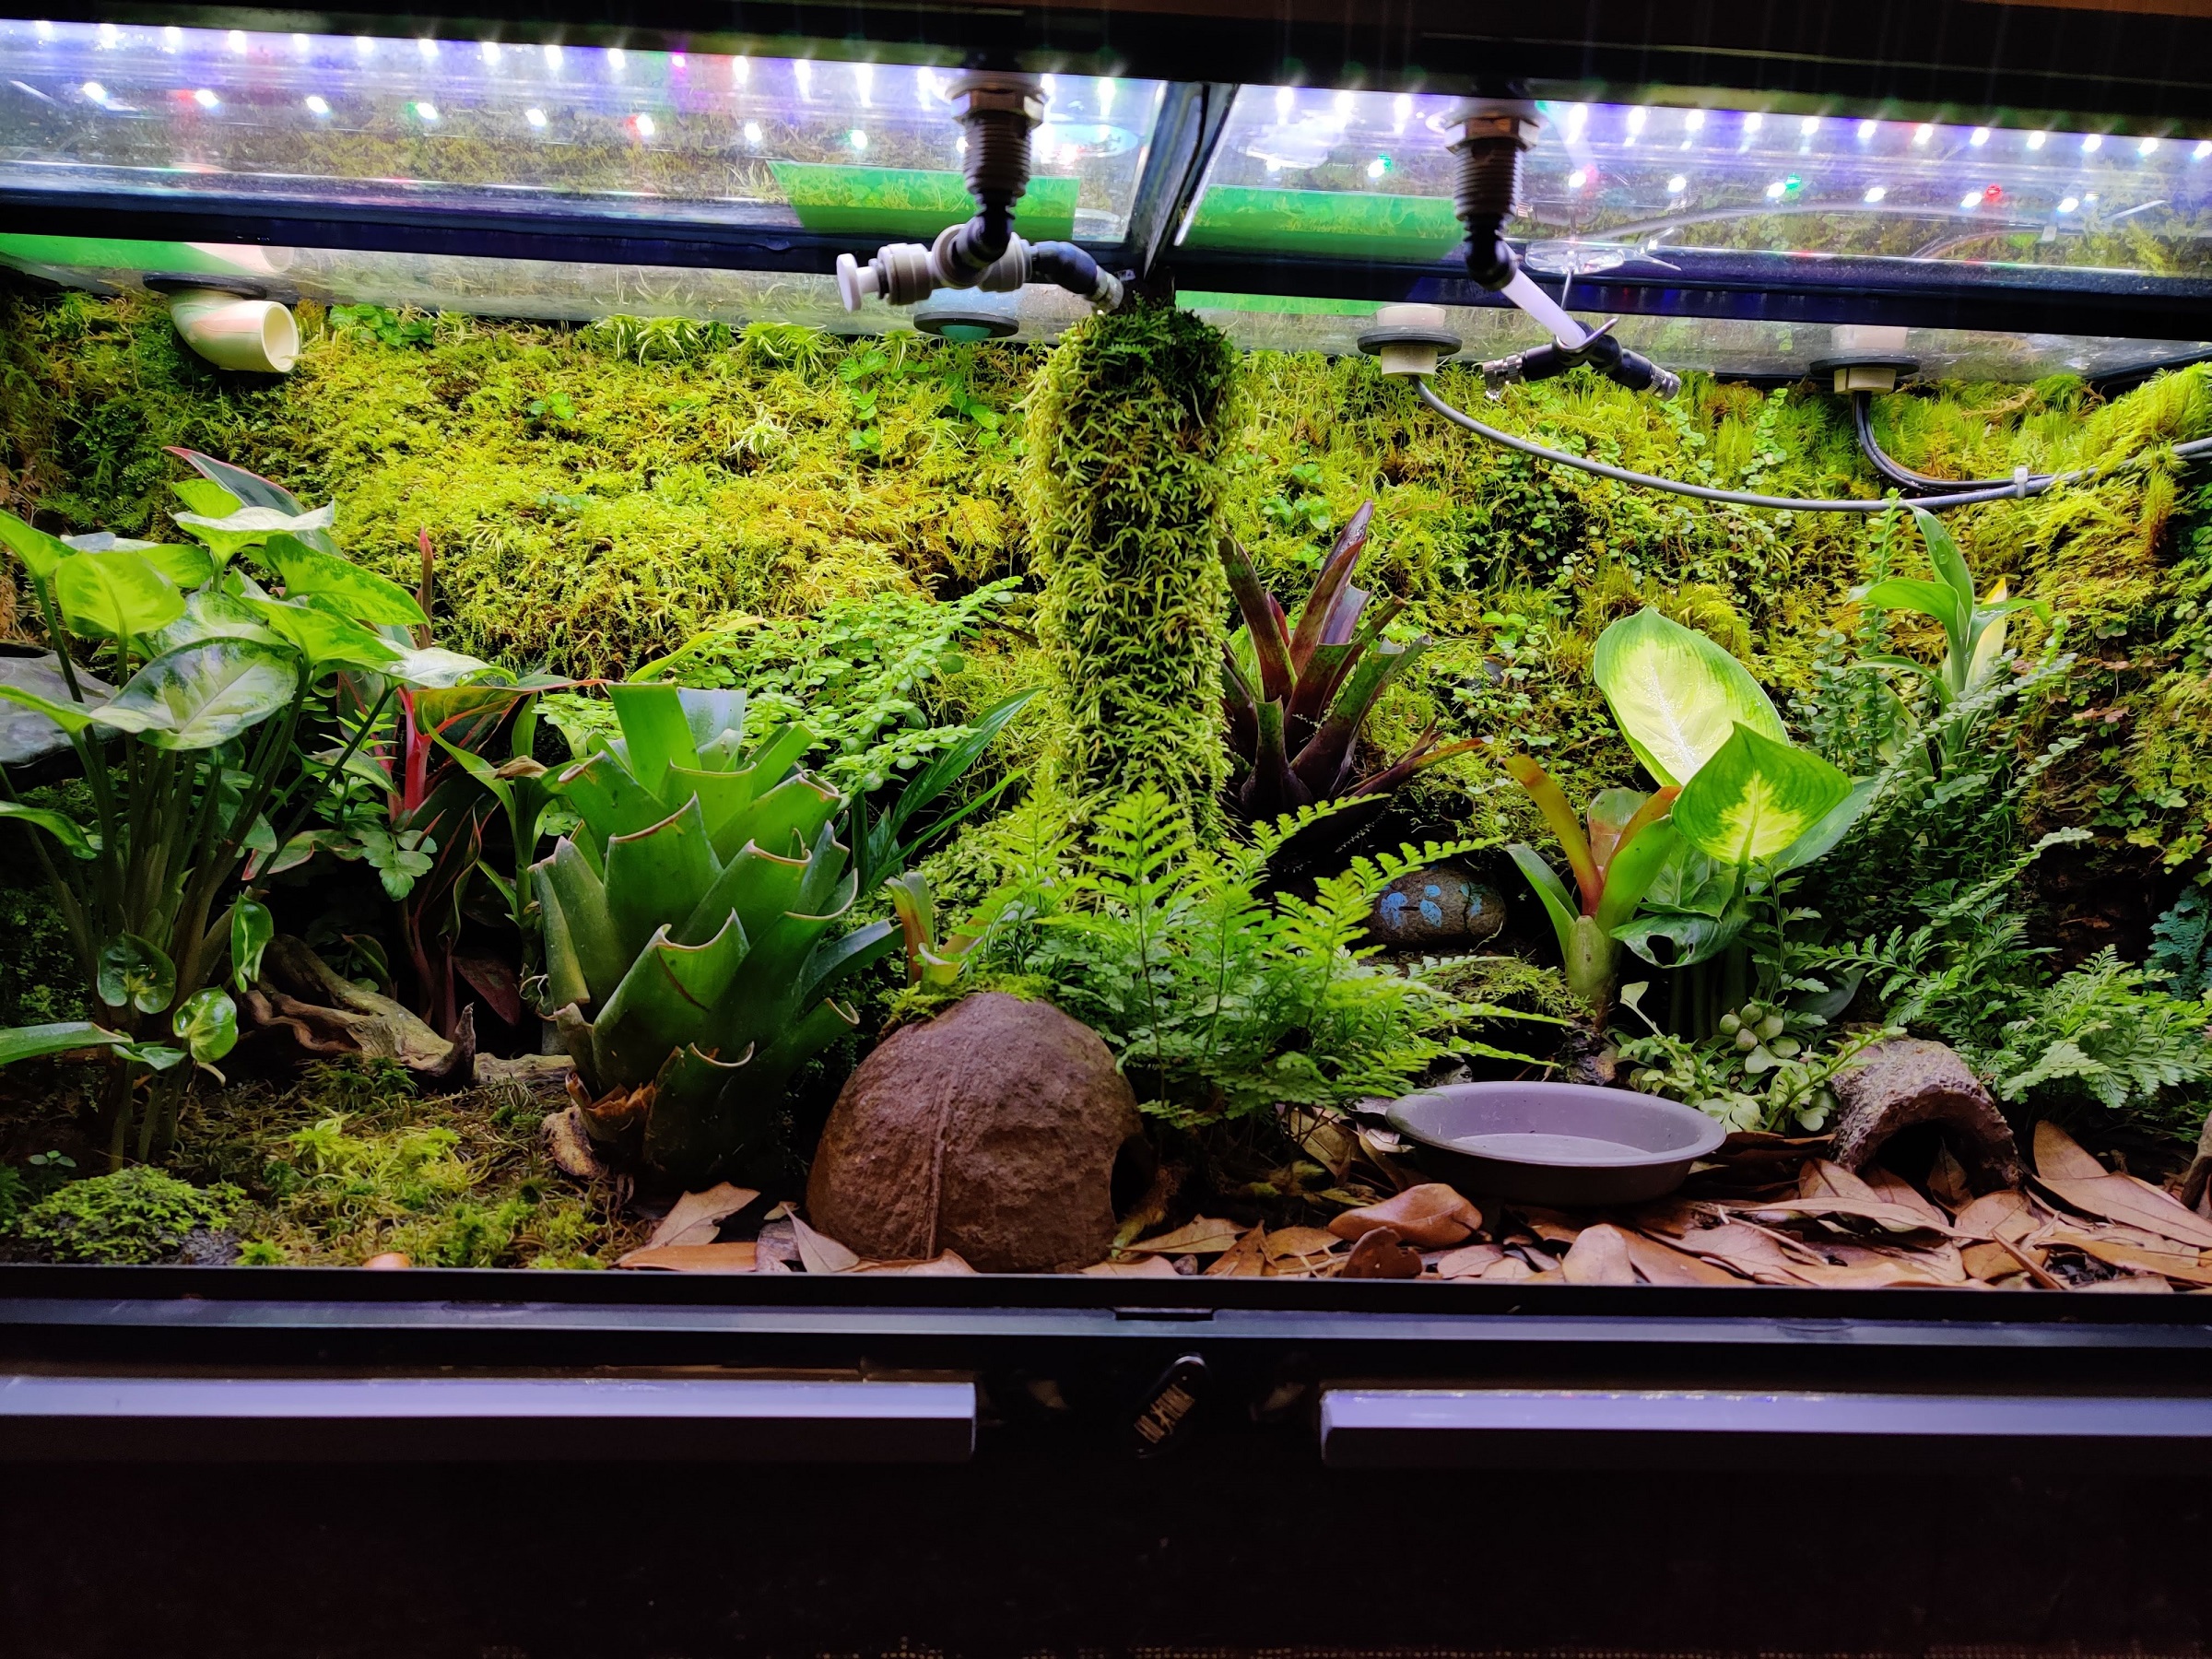
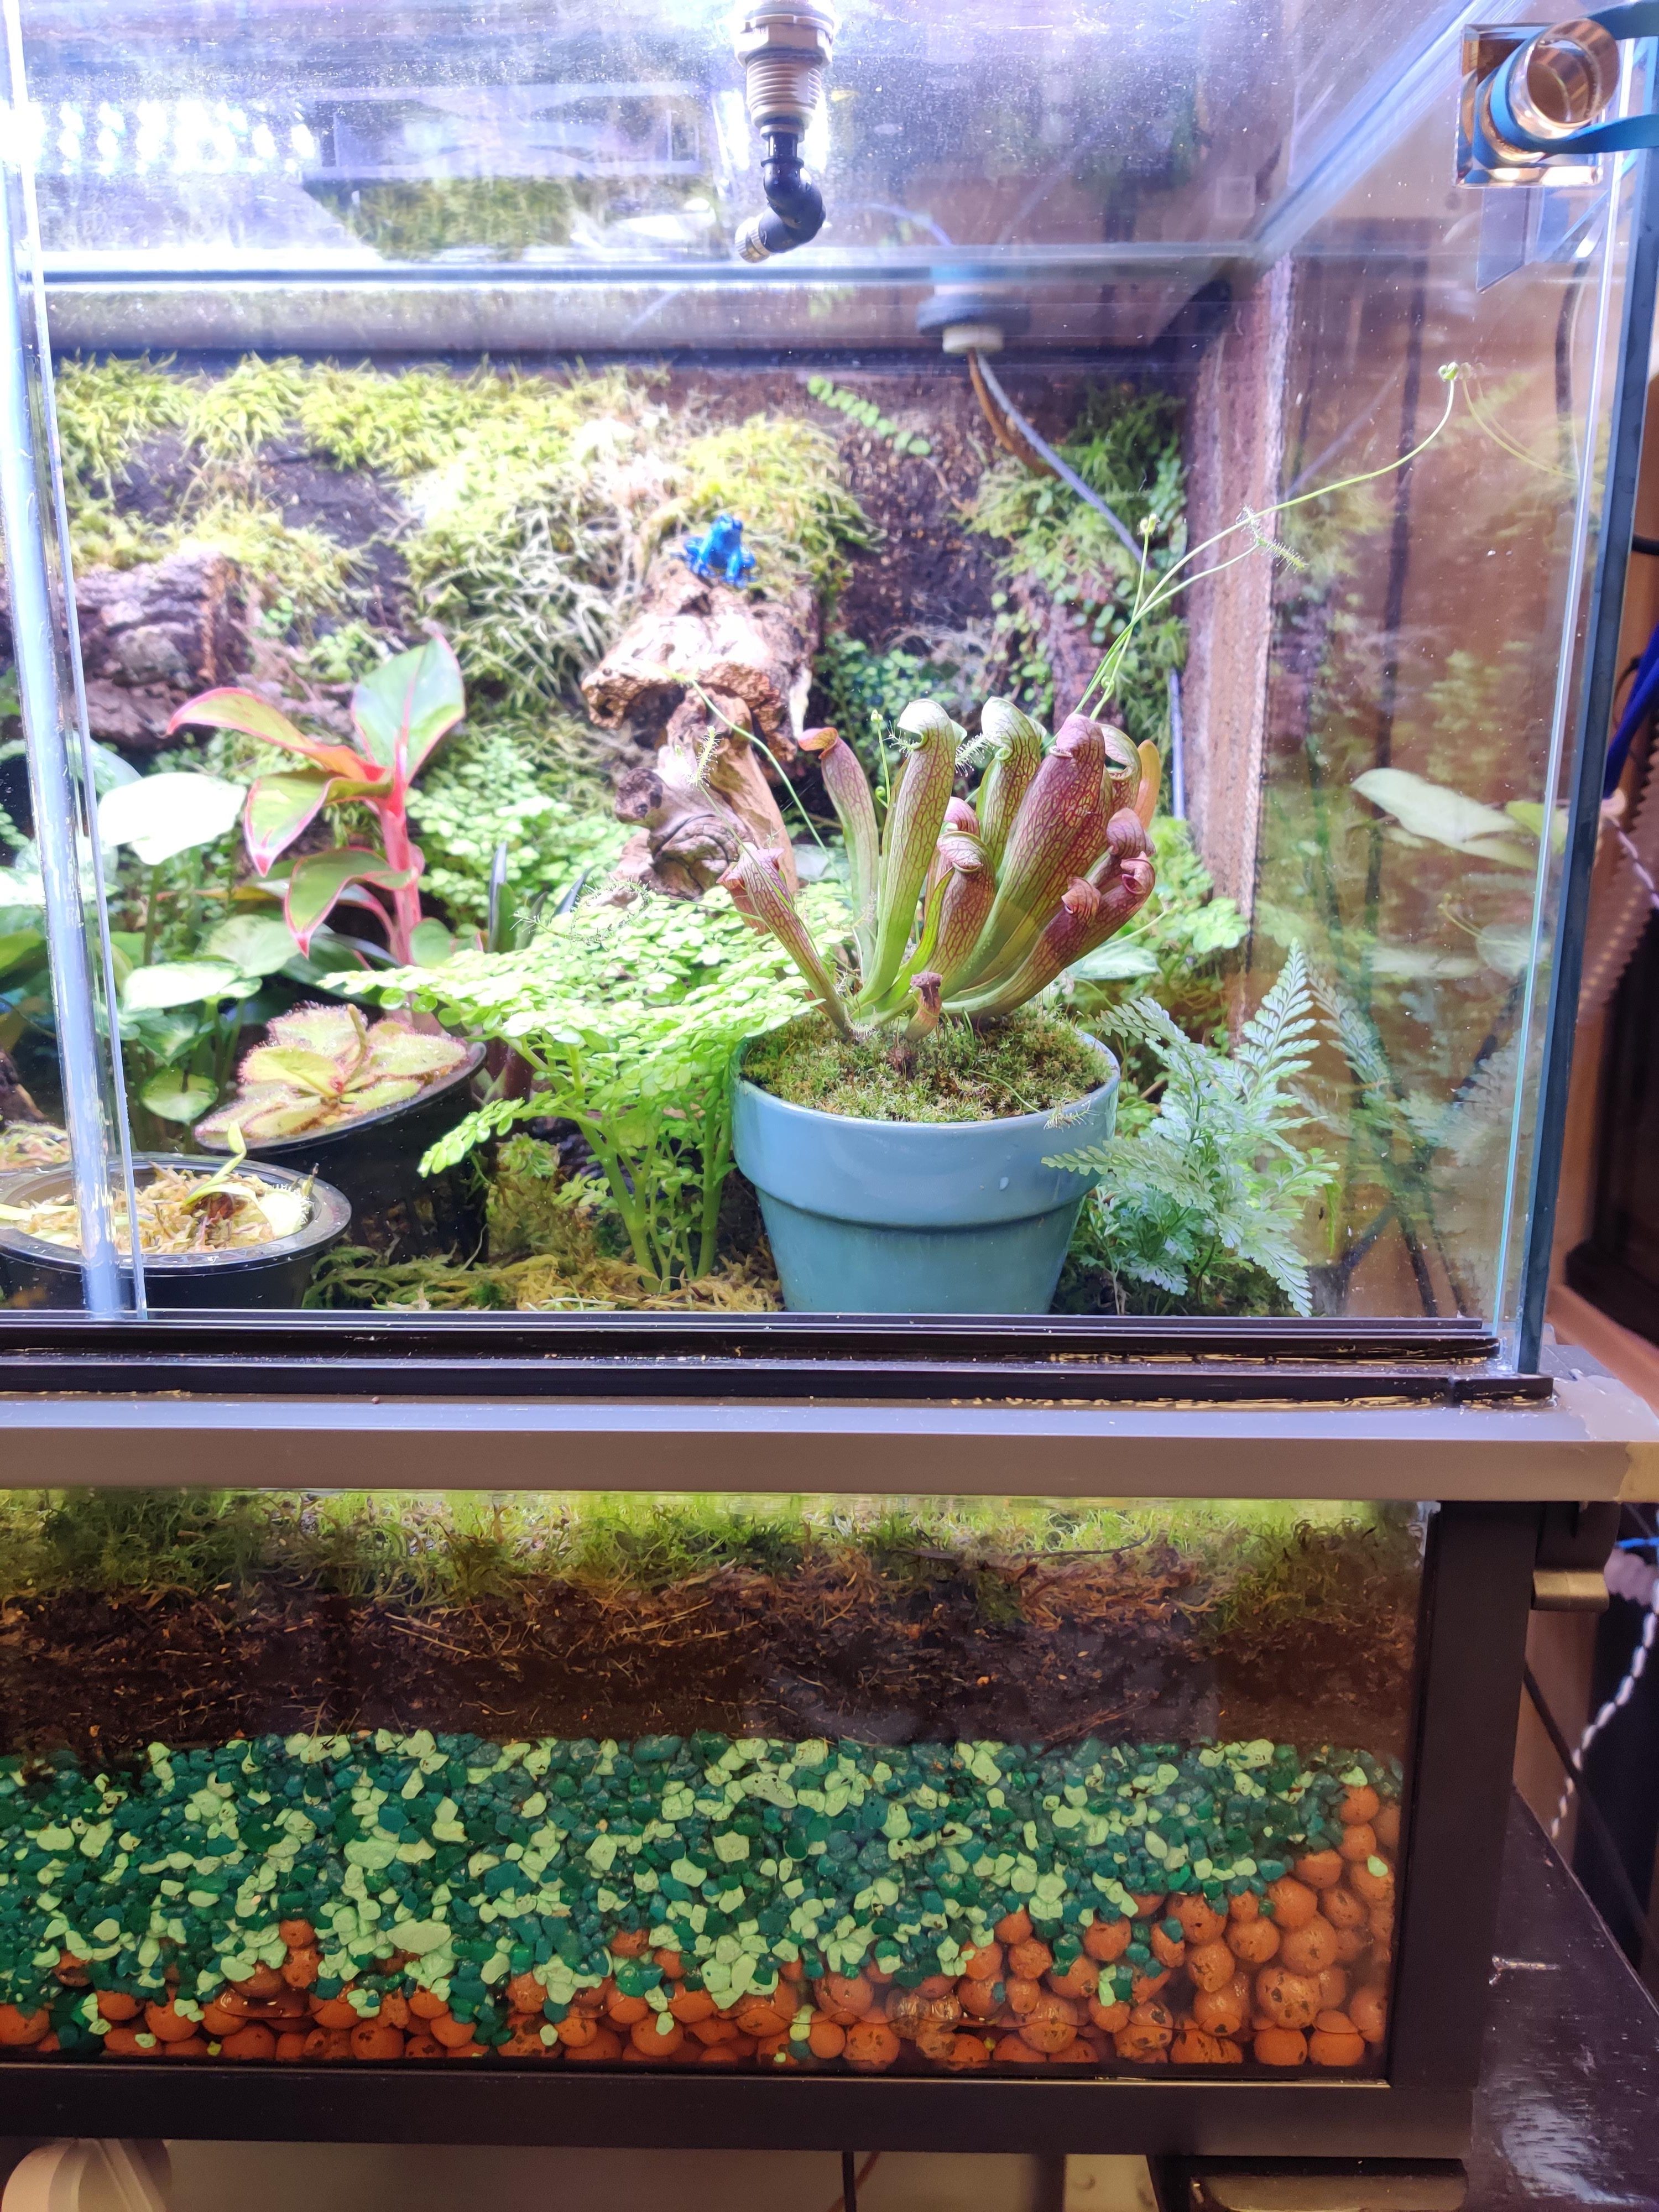
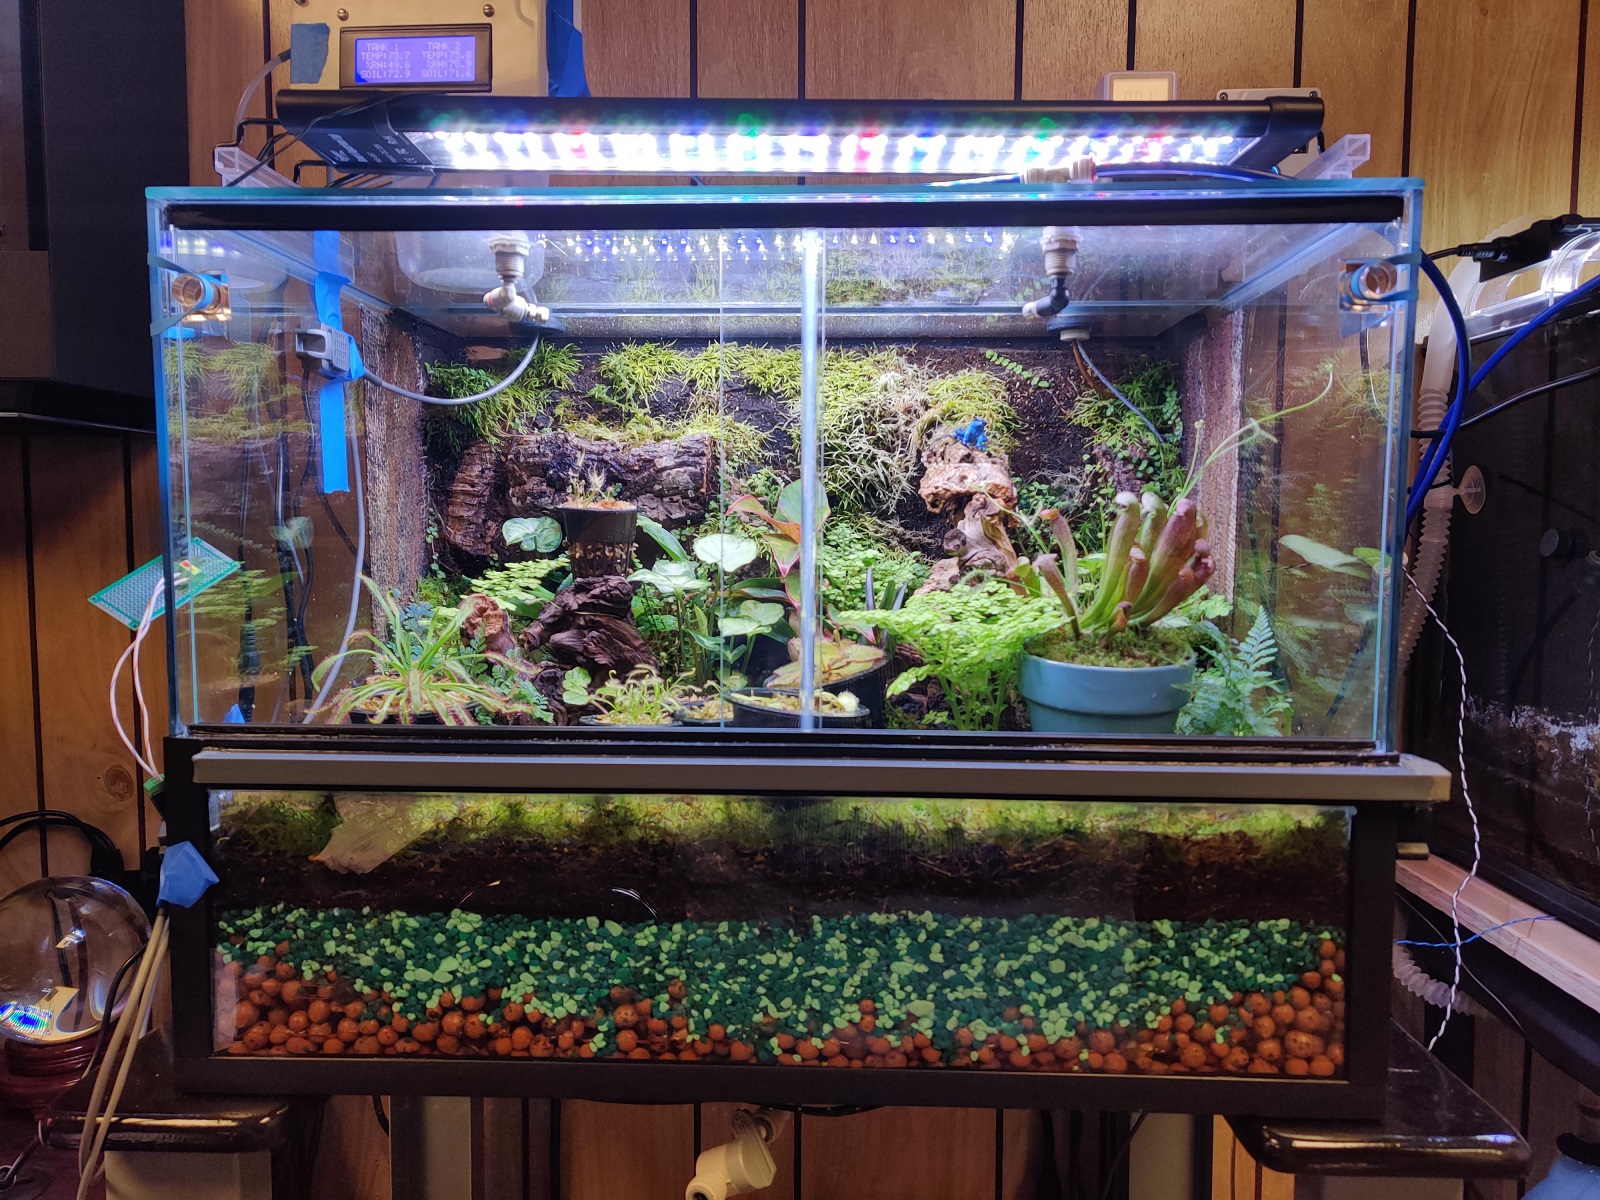
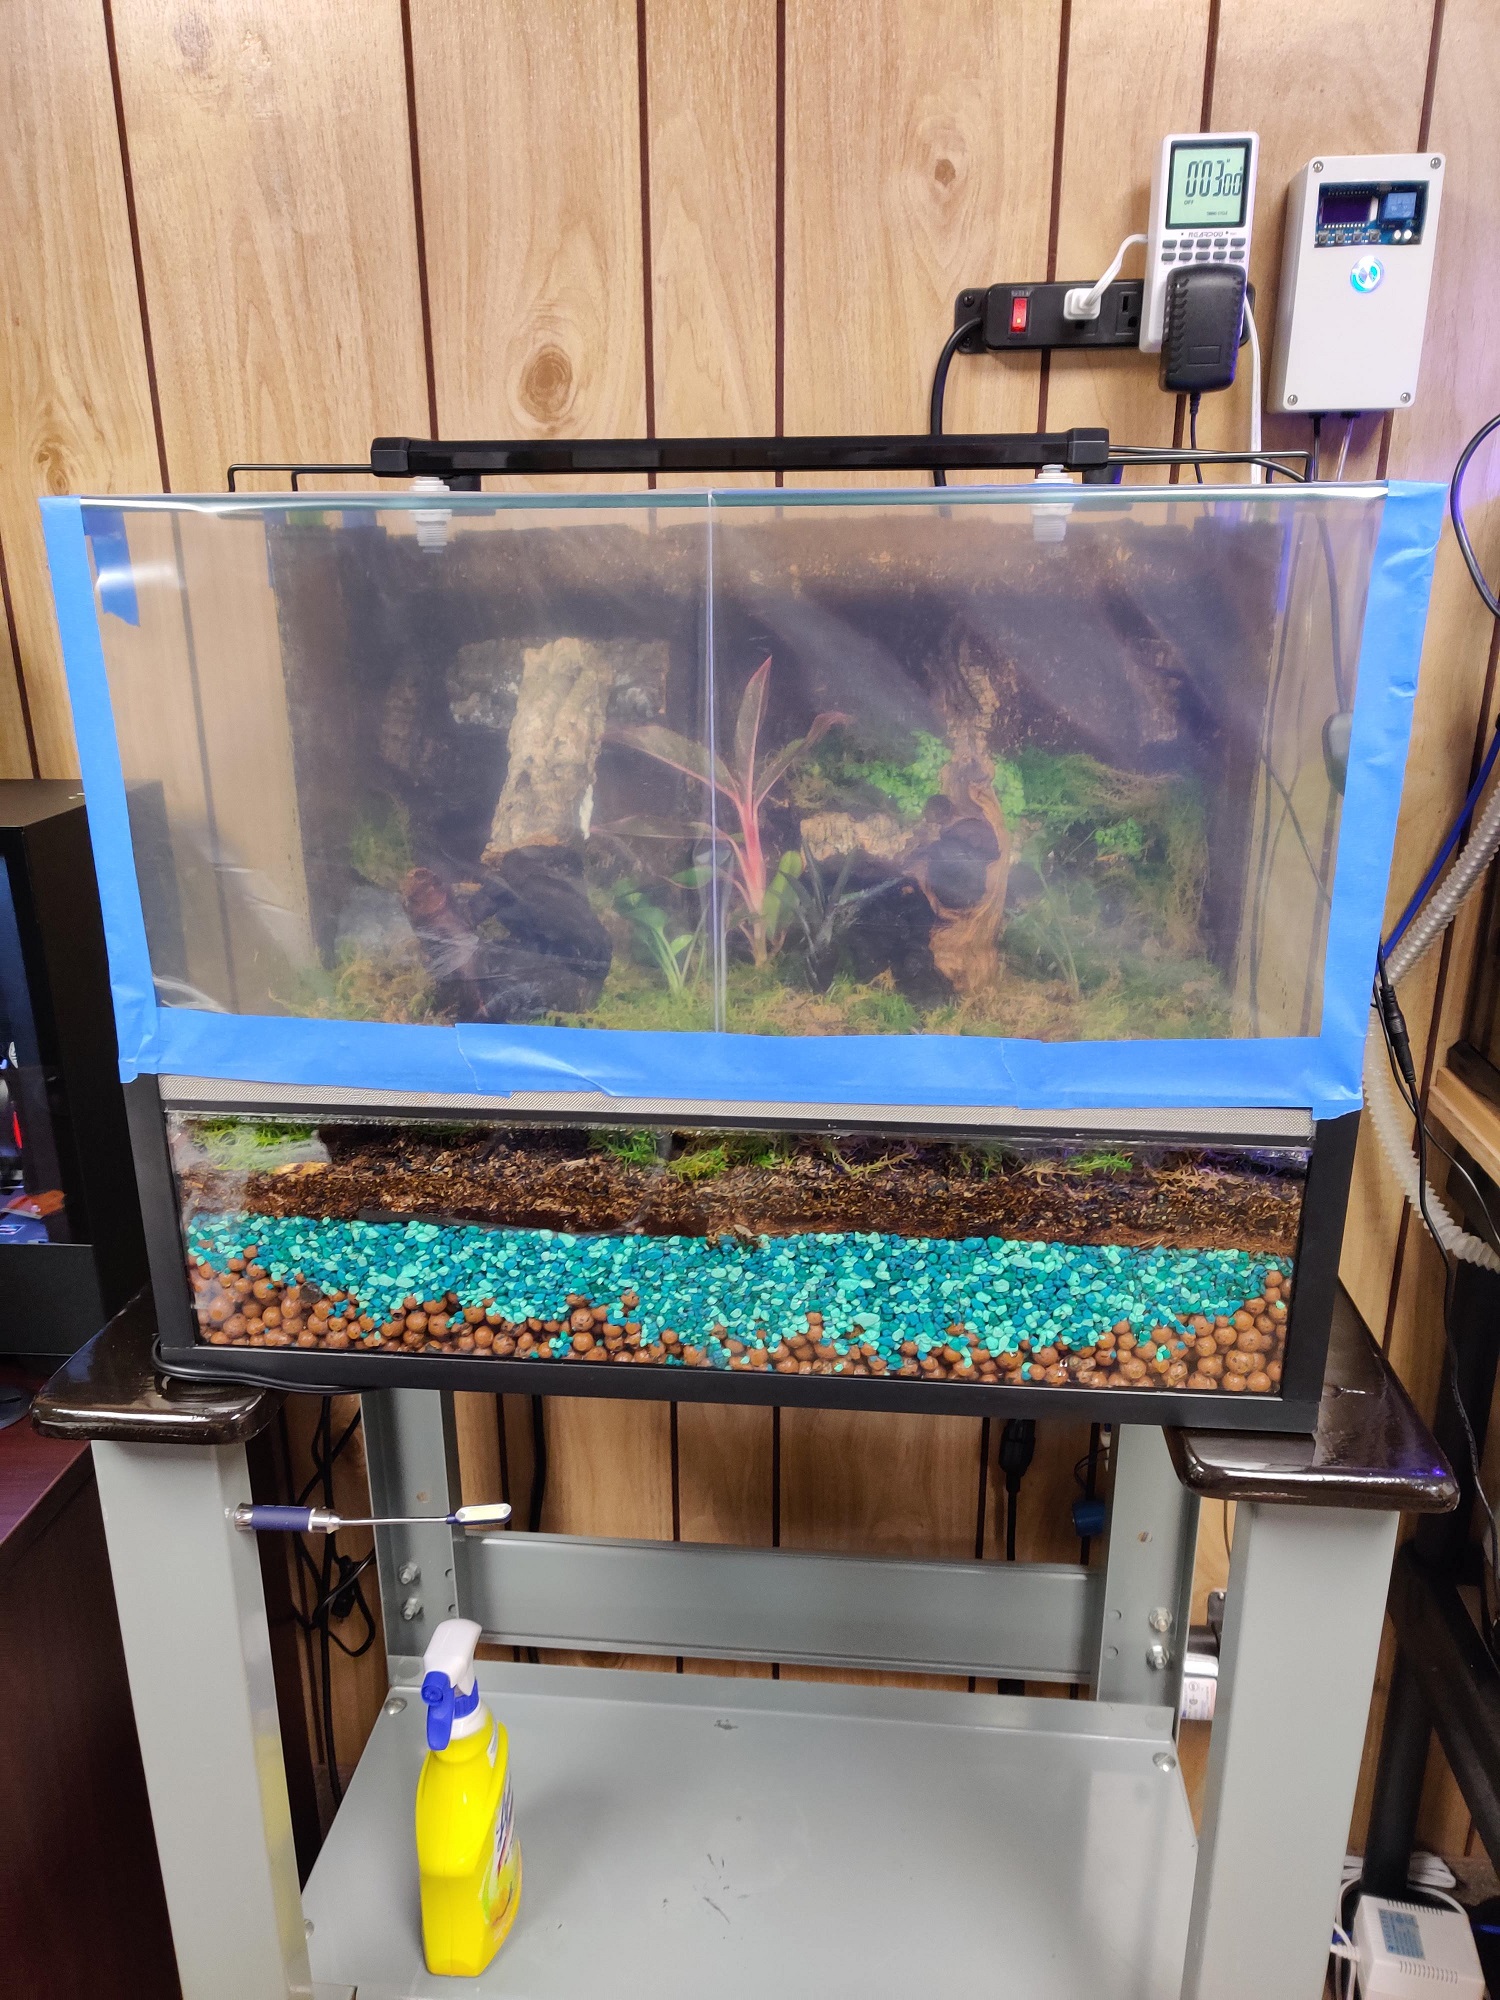
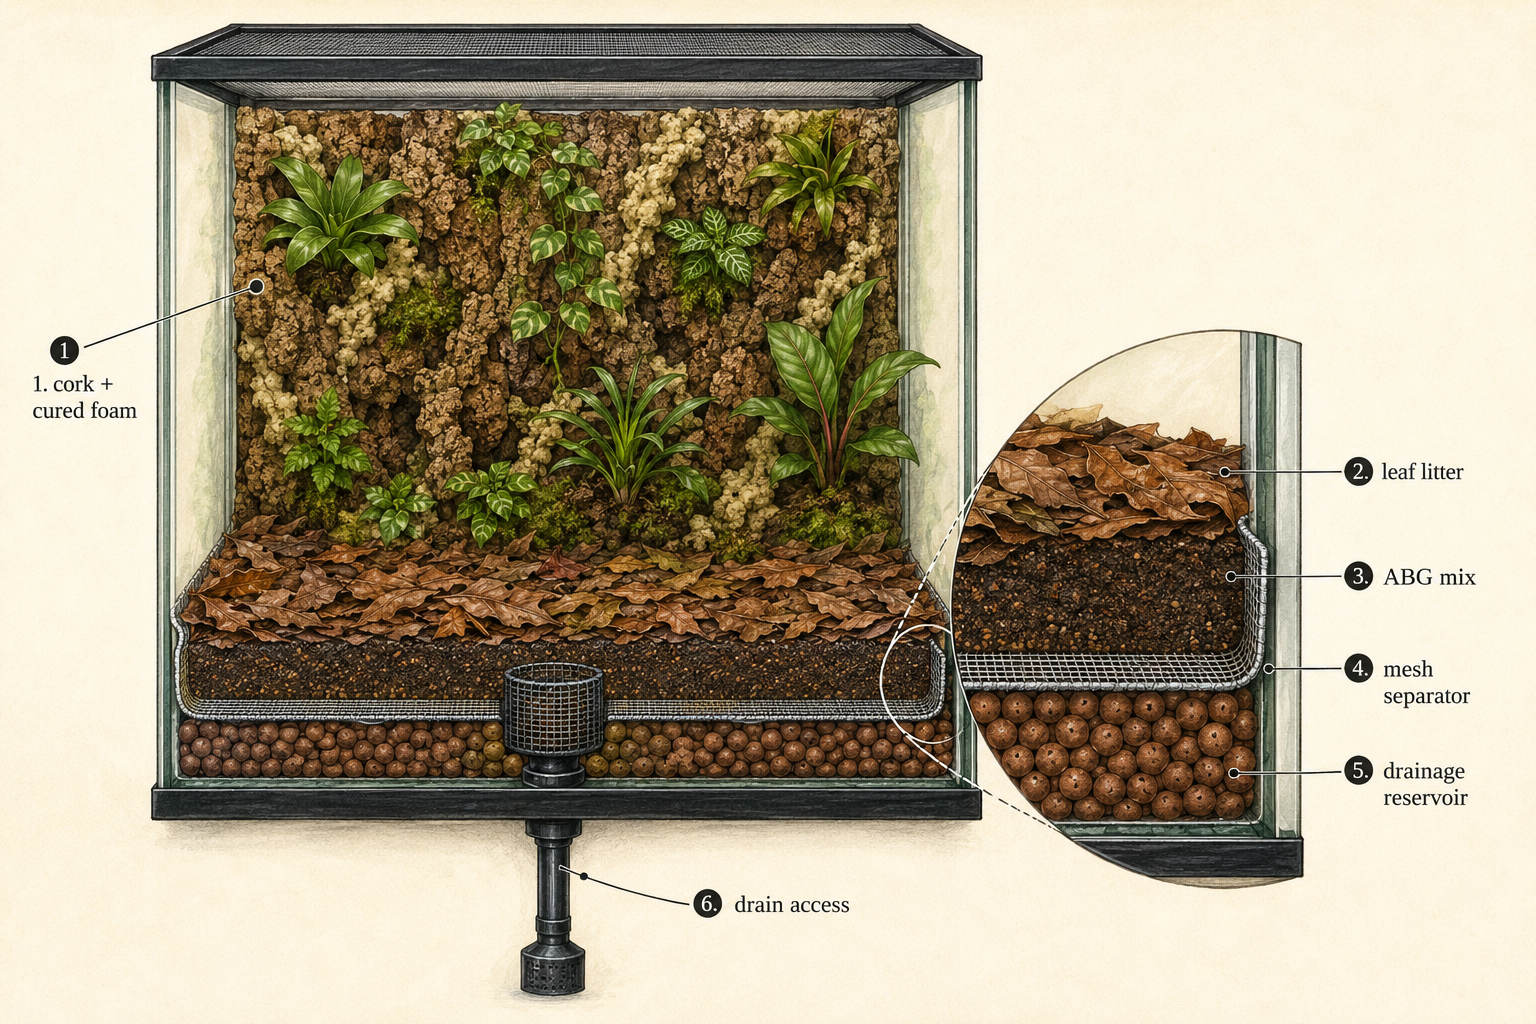
The base of a planted vivarium is a reservoir for the water that passes through the substrate, and the false bottom is what keeps the soil up out of it. Both of my tanks use the same method: plastic egg crate cut slightly smaller than the floor, supported evenly on short PVC pipe risers, and covered with non-toxic fine mesh. In this tank the expanded clay you can see through the glass runs only along the very front, mostly for looks. Everything behind it is open egg-crate platform, which leaves the reservoir empty, free-draining, and easy to empty through the bulkhead.
The landscape
The background got the same treatment as my Exo Terra, except this time I had some practice. Dry-fit the cork and wood first, then anchor the hardscape with aquarium silicone and polyurethane expanding foam. Let the foam fully cure, then carve it to shape with a handheld flexible saw, vacuuming up the crumbs as you go. When it looks right and everything is clean, coat the carved foam with silicone, sealing it to the glass at every edge, and sprinkle ground coconut husk over the wet silicone, packing it in before the silicone cures. Then wait again. Curing time is where the patience goes.
Above the drainage mesh goes a loose, pre-moistened ABG mix: two parts tree-fern fiber, two parts fine orchid or fir bark, and one part each sphagnum moss, horticultural charcoal, and peat. Keep it airy instead of packing it flat, and make it deeper where rooted plants need support.
Finish the ground with clean, pesticide-free leaf litter such as live oak or magnolia. A generous layer creates cover for frogs, feeds springtails and isopods as it breaks down, protects the substrate surface, and should be replenished as it disappears.
First green
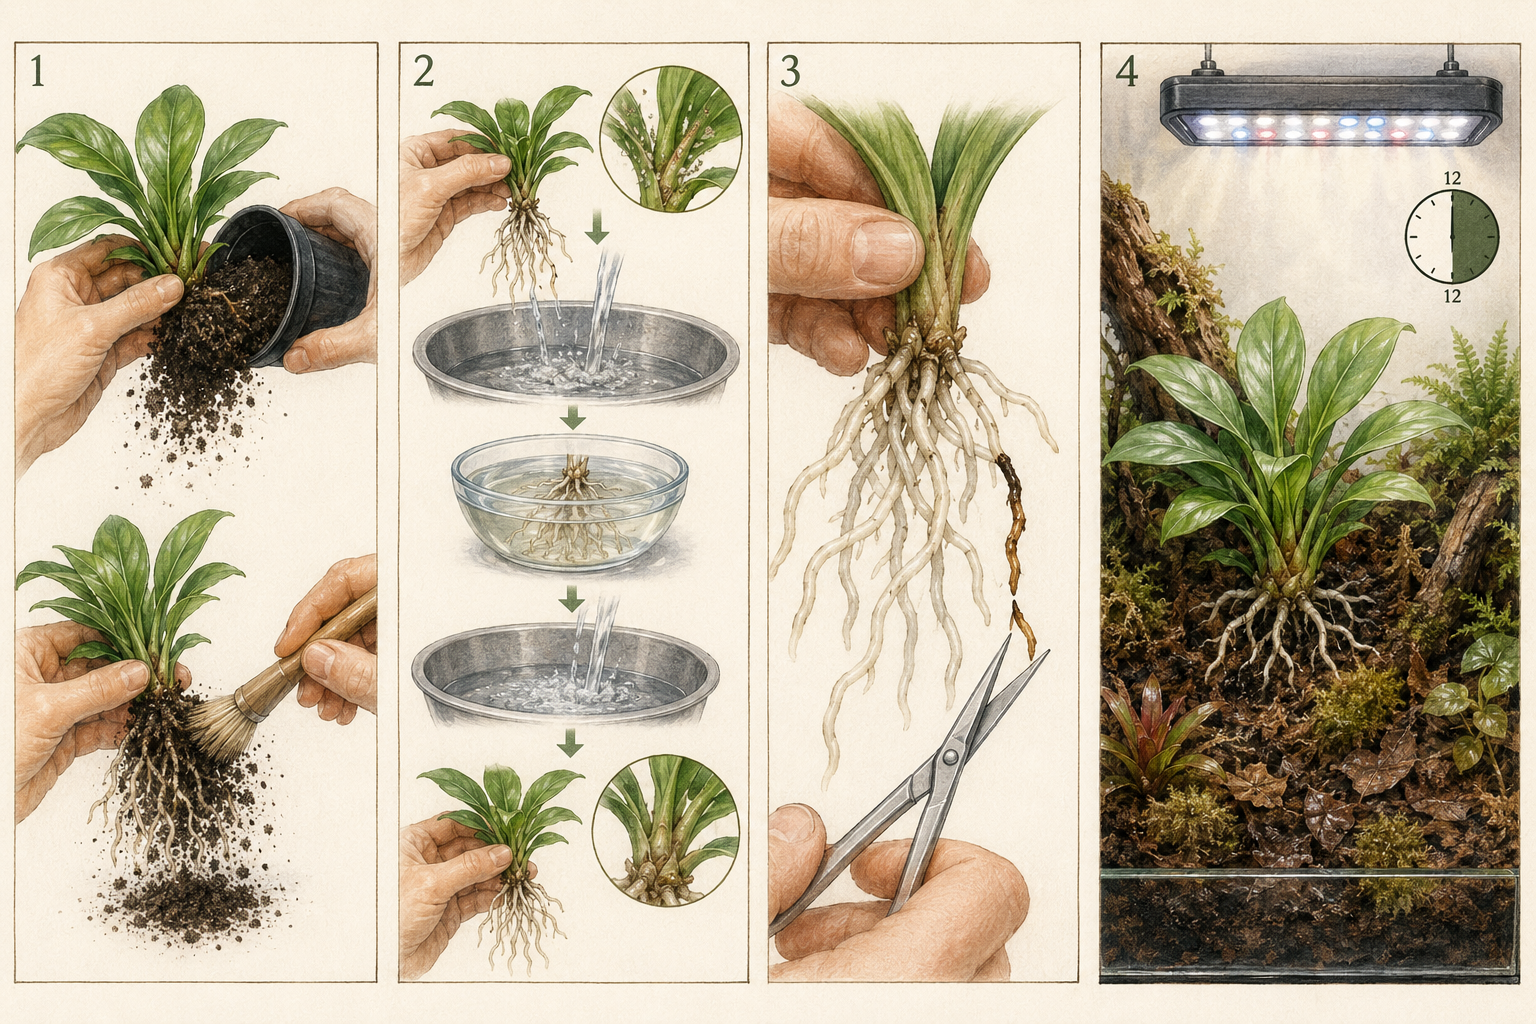
Do not move a nursery plant straight into the vivarium. Quarantine it when possible, remove the pot and all nursery soil, rinse the leaves, stems, and roots thoroughly, trim damaged roots, inspect for pests, and use a proven plant-safe processing method. Rinse again before planting so fertilizer, pesticides, pests, and contaminated soil do not enter the enclosure.
Use a bright, full-spectrum LED in the 5000 to 6700K daylight range on a consistent 12-hour timer. Light falls off quickly with distance, so put higher-light plants near the top and shade-tolerant plants lower down. Watch the plants: stretching suggests too little light; bleaching, crisp edges, or excess heat mean the light is too intense or too close.
Automation
The vent fans were the start of it. Once one ESP32 was switching blowers, it was a short slide to running the whole room through Home Assistant. The misters run on a solenoid. The lights step through four relay schedules: morning, day, evening, and night. The vent fans come on when humidity climbs. Heaters mounted on the sides, base, or back of the tanks give a boost of warmth in the winter, when the room runs cold. And the first tank has a fogger plumbed in, fed through that PVC elbow you can spot in the photos.
The numbers make slow changes easier to see, but the plants, the drainage layer, the glass, and the leaf litter still tell the fuller story. I compare the readings with new growth, condensation, drying patterns, and standing water before changing misting, ventilation, or light.
Explore the dashboard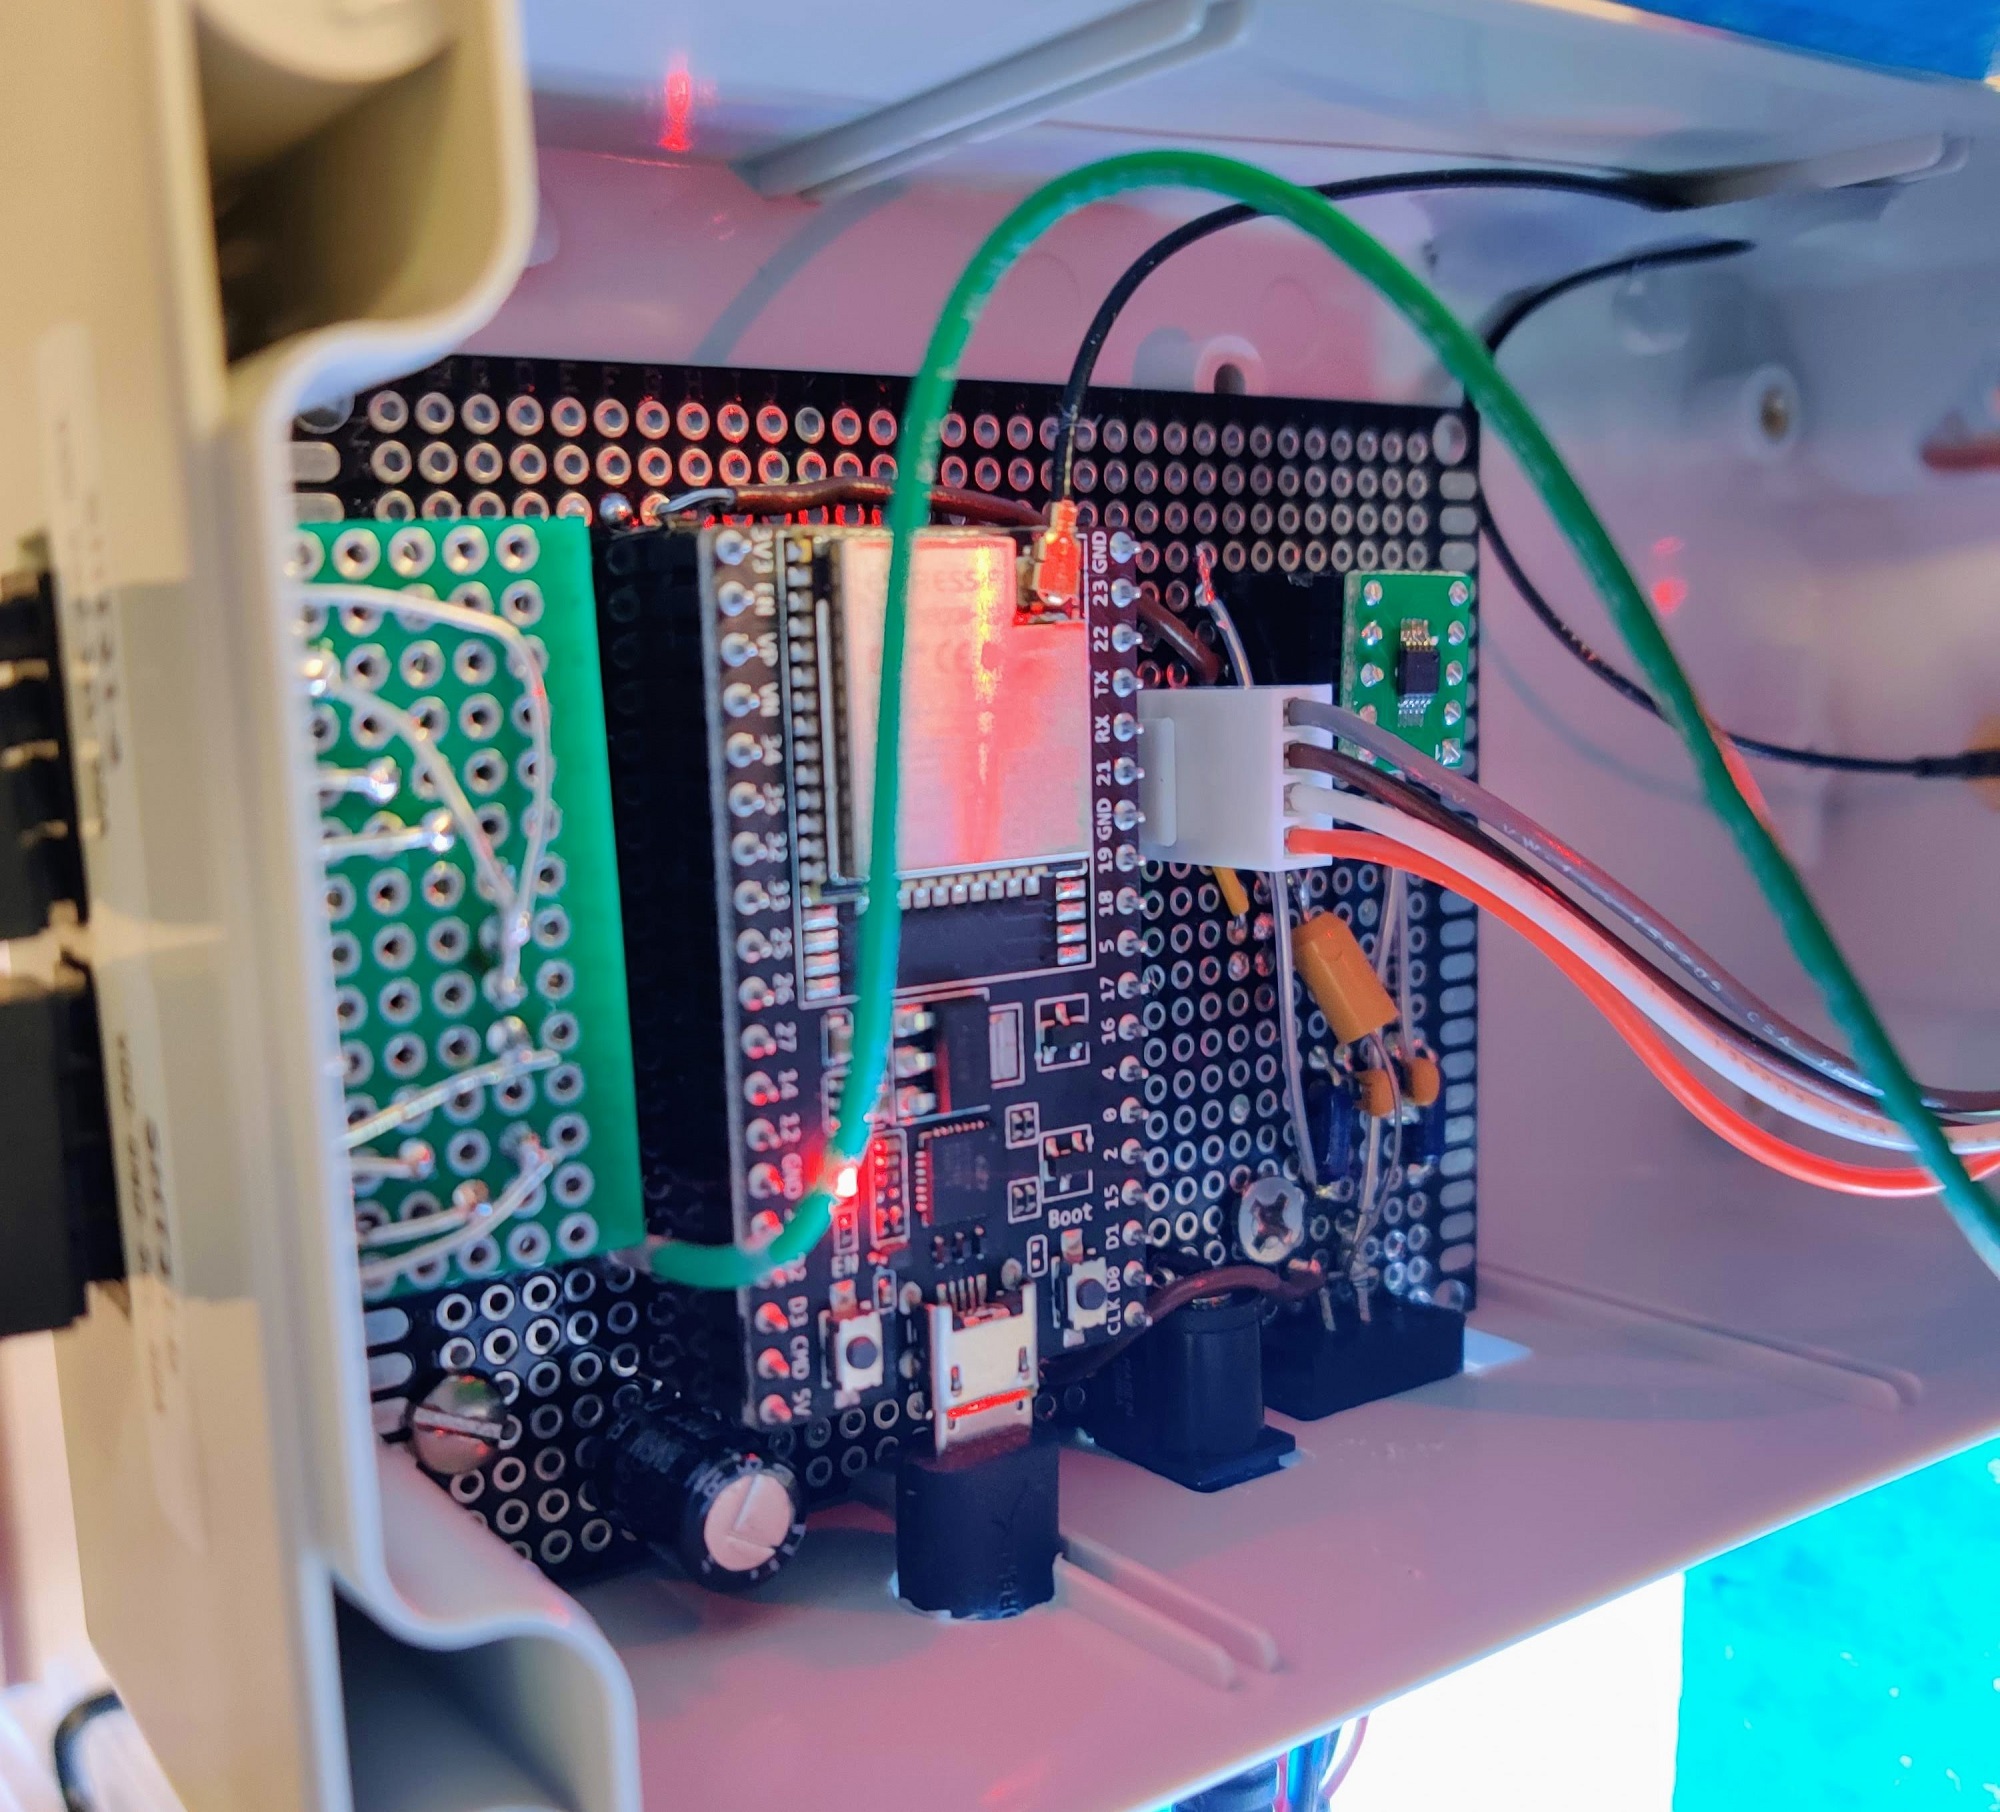
Before frogs move in
Planting day is the beginning of the grow-in period, not the finish line. Plant it, add the cleanup crew, dial in the misting, and then let it grow for four to eight weeks while roots take hold, leaf litter settles, and the springtails and isopods establish. That quiet time exposes drainage, lighting, misting, or mold problems while they are still easy to correct.
A ready vivarium is not one that looks perfect on day one. It is one that drains correctly, holds stable conditions, shows healthy new growth, and has been observed long enough that adding frogs is the next careful step, not a gamble.
The payoff
One day I noticed that one of my original males had what looked like a growth on his back, and the growth looked like it had its own heartbeat. It was a freshly hatched tadpole. Dyeing dart frog males guard the clutches of eggs, and when the eggs hatch, the male carries each tadpole around on his back, hunting for standing water. He deposits the tadpole there and protects it while it begins to morph. The eggs were half the reason I built this tank in the first place, and there was the follow-through happening on its own: eggs to tadpoles to morphs to juveniles, in a glass box that started as a cardboard mockup.
Where it led
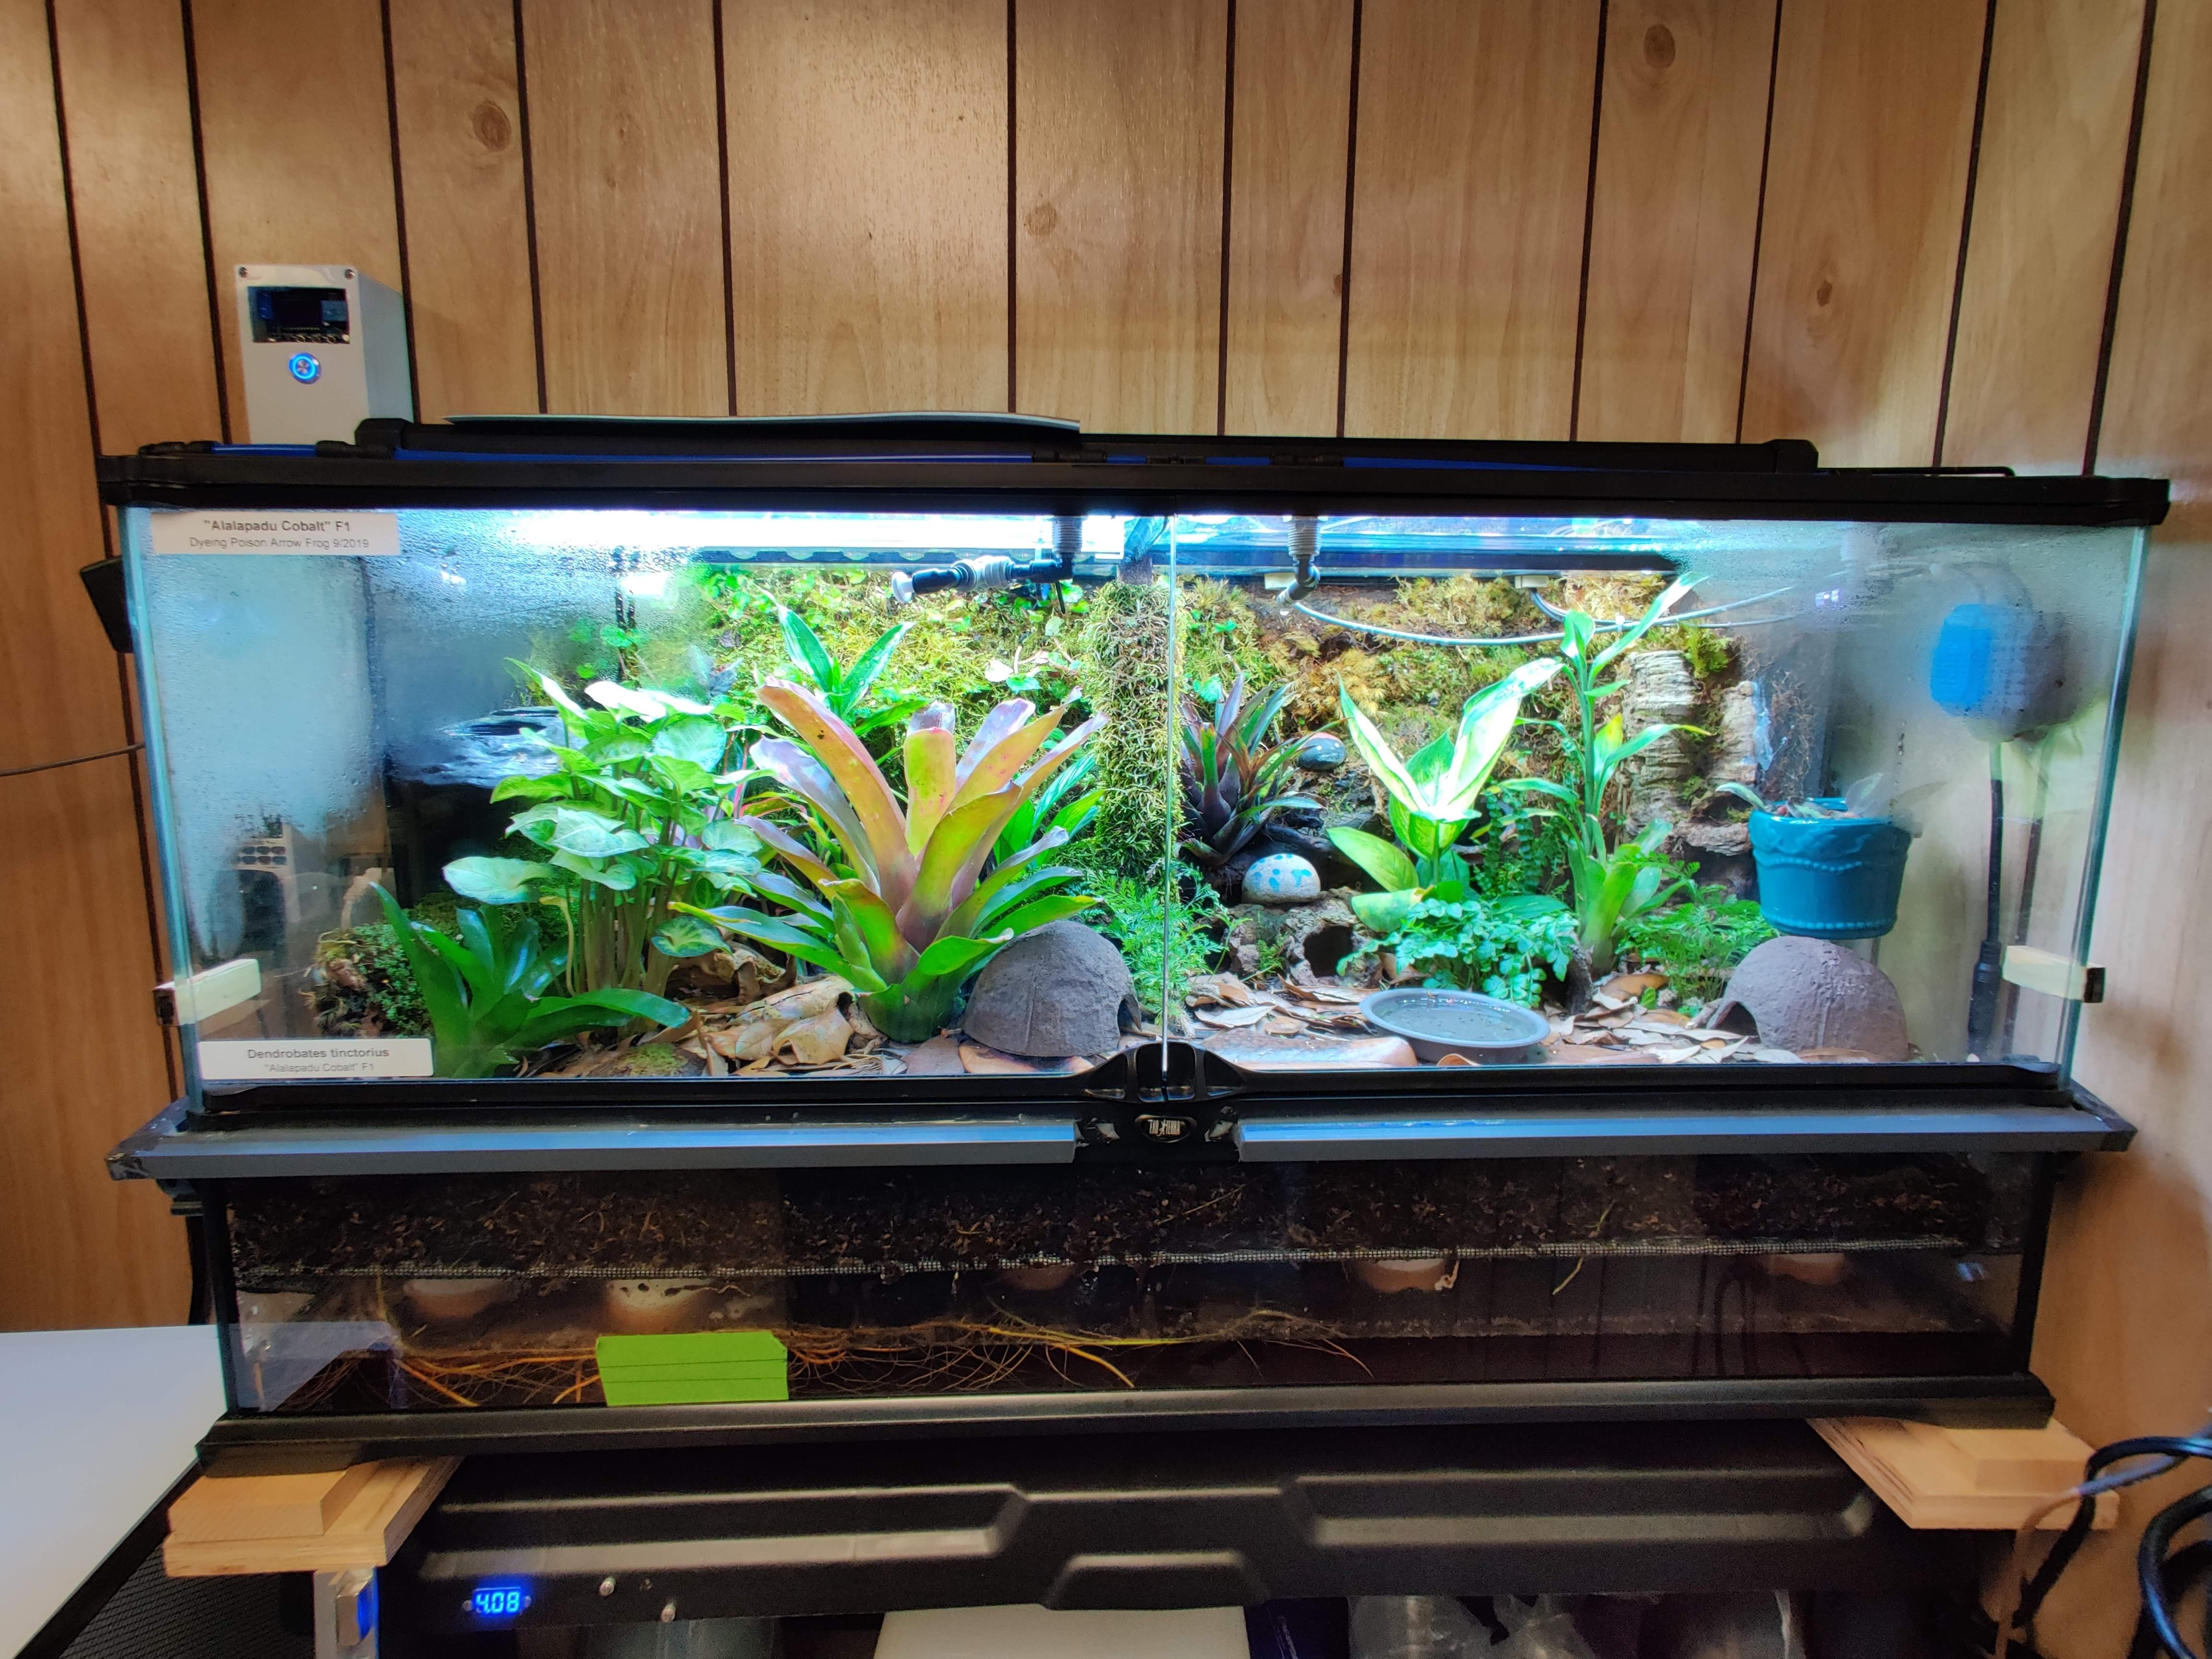
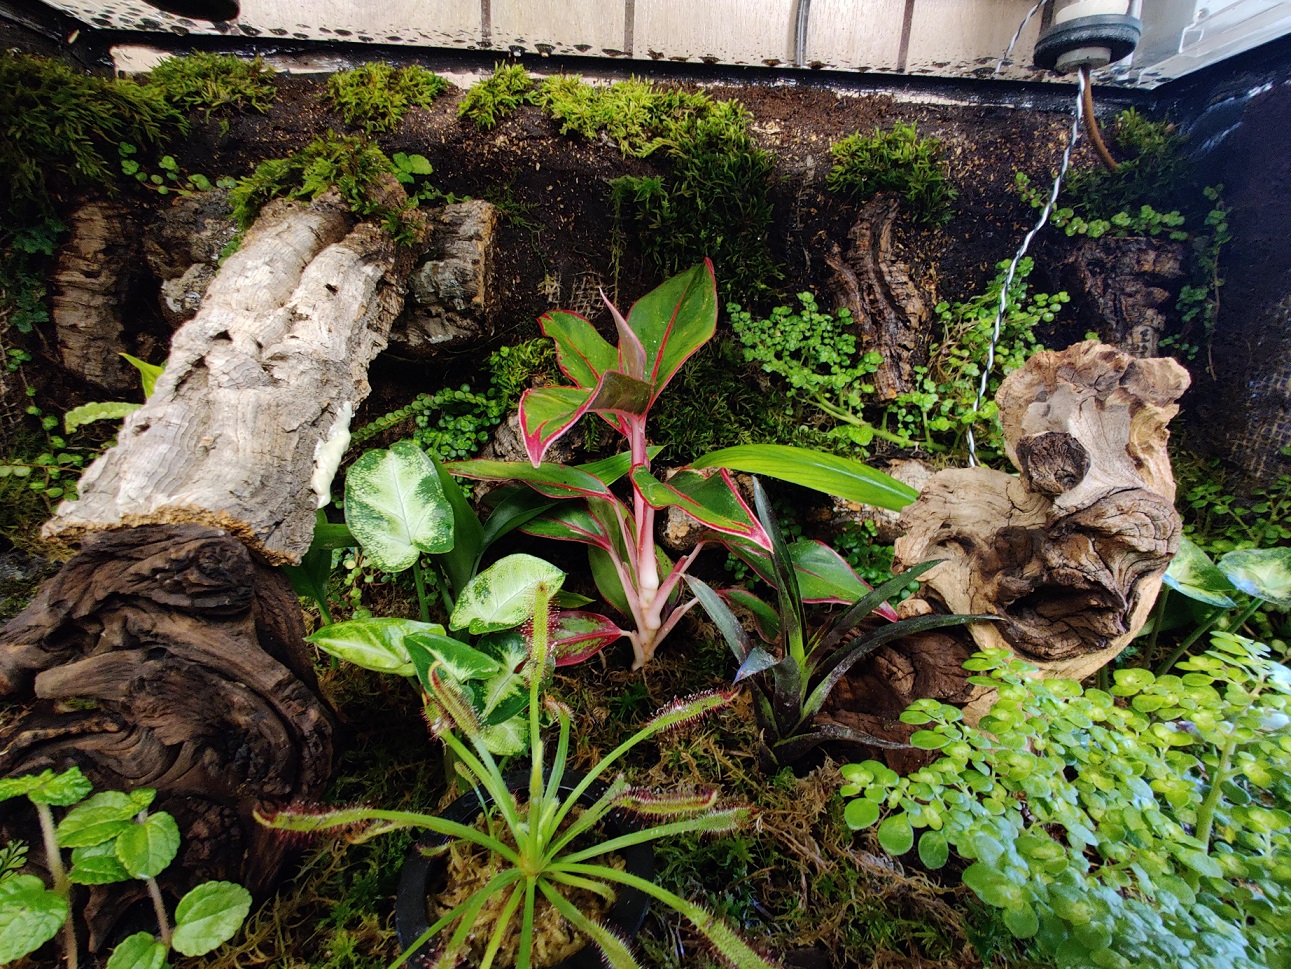
Plant views from the established enclosure, following the build from early growth to a fuller landscape.